DIY Polymer Clay Keychain Gifts

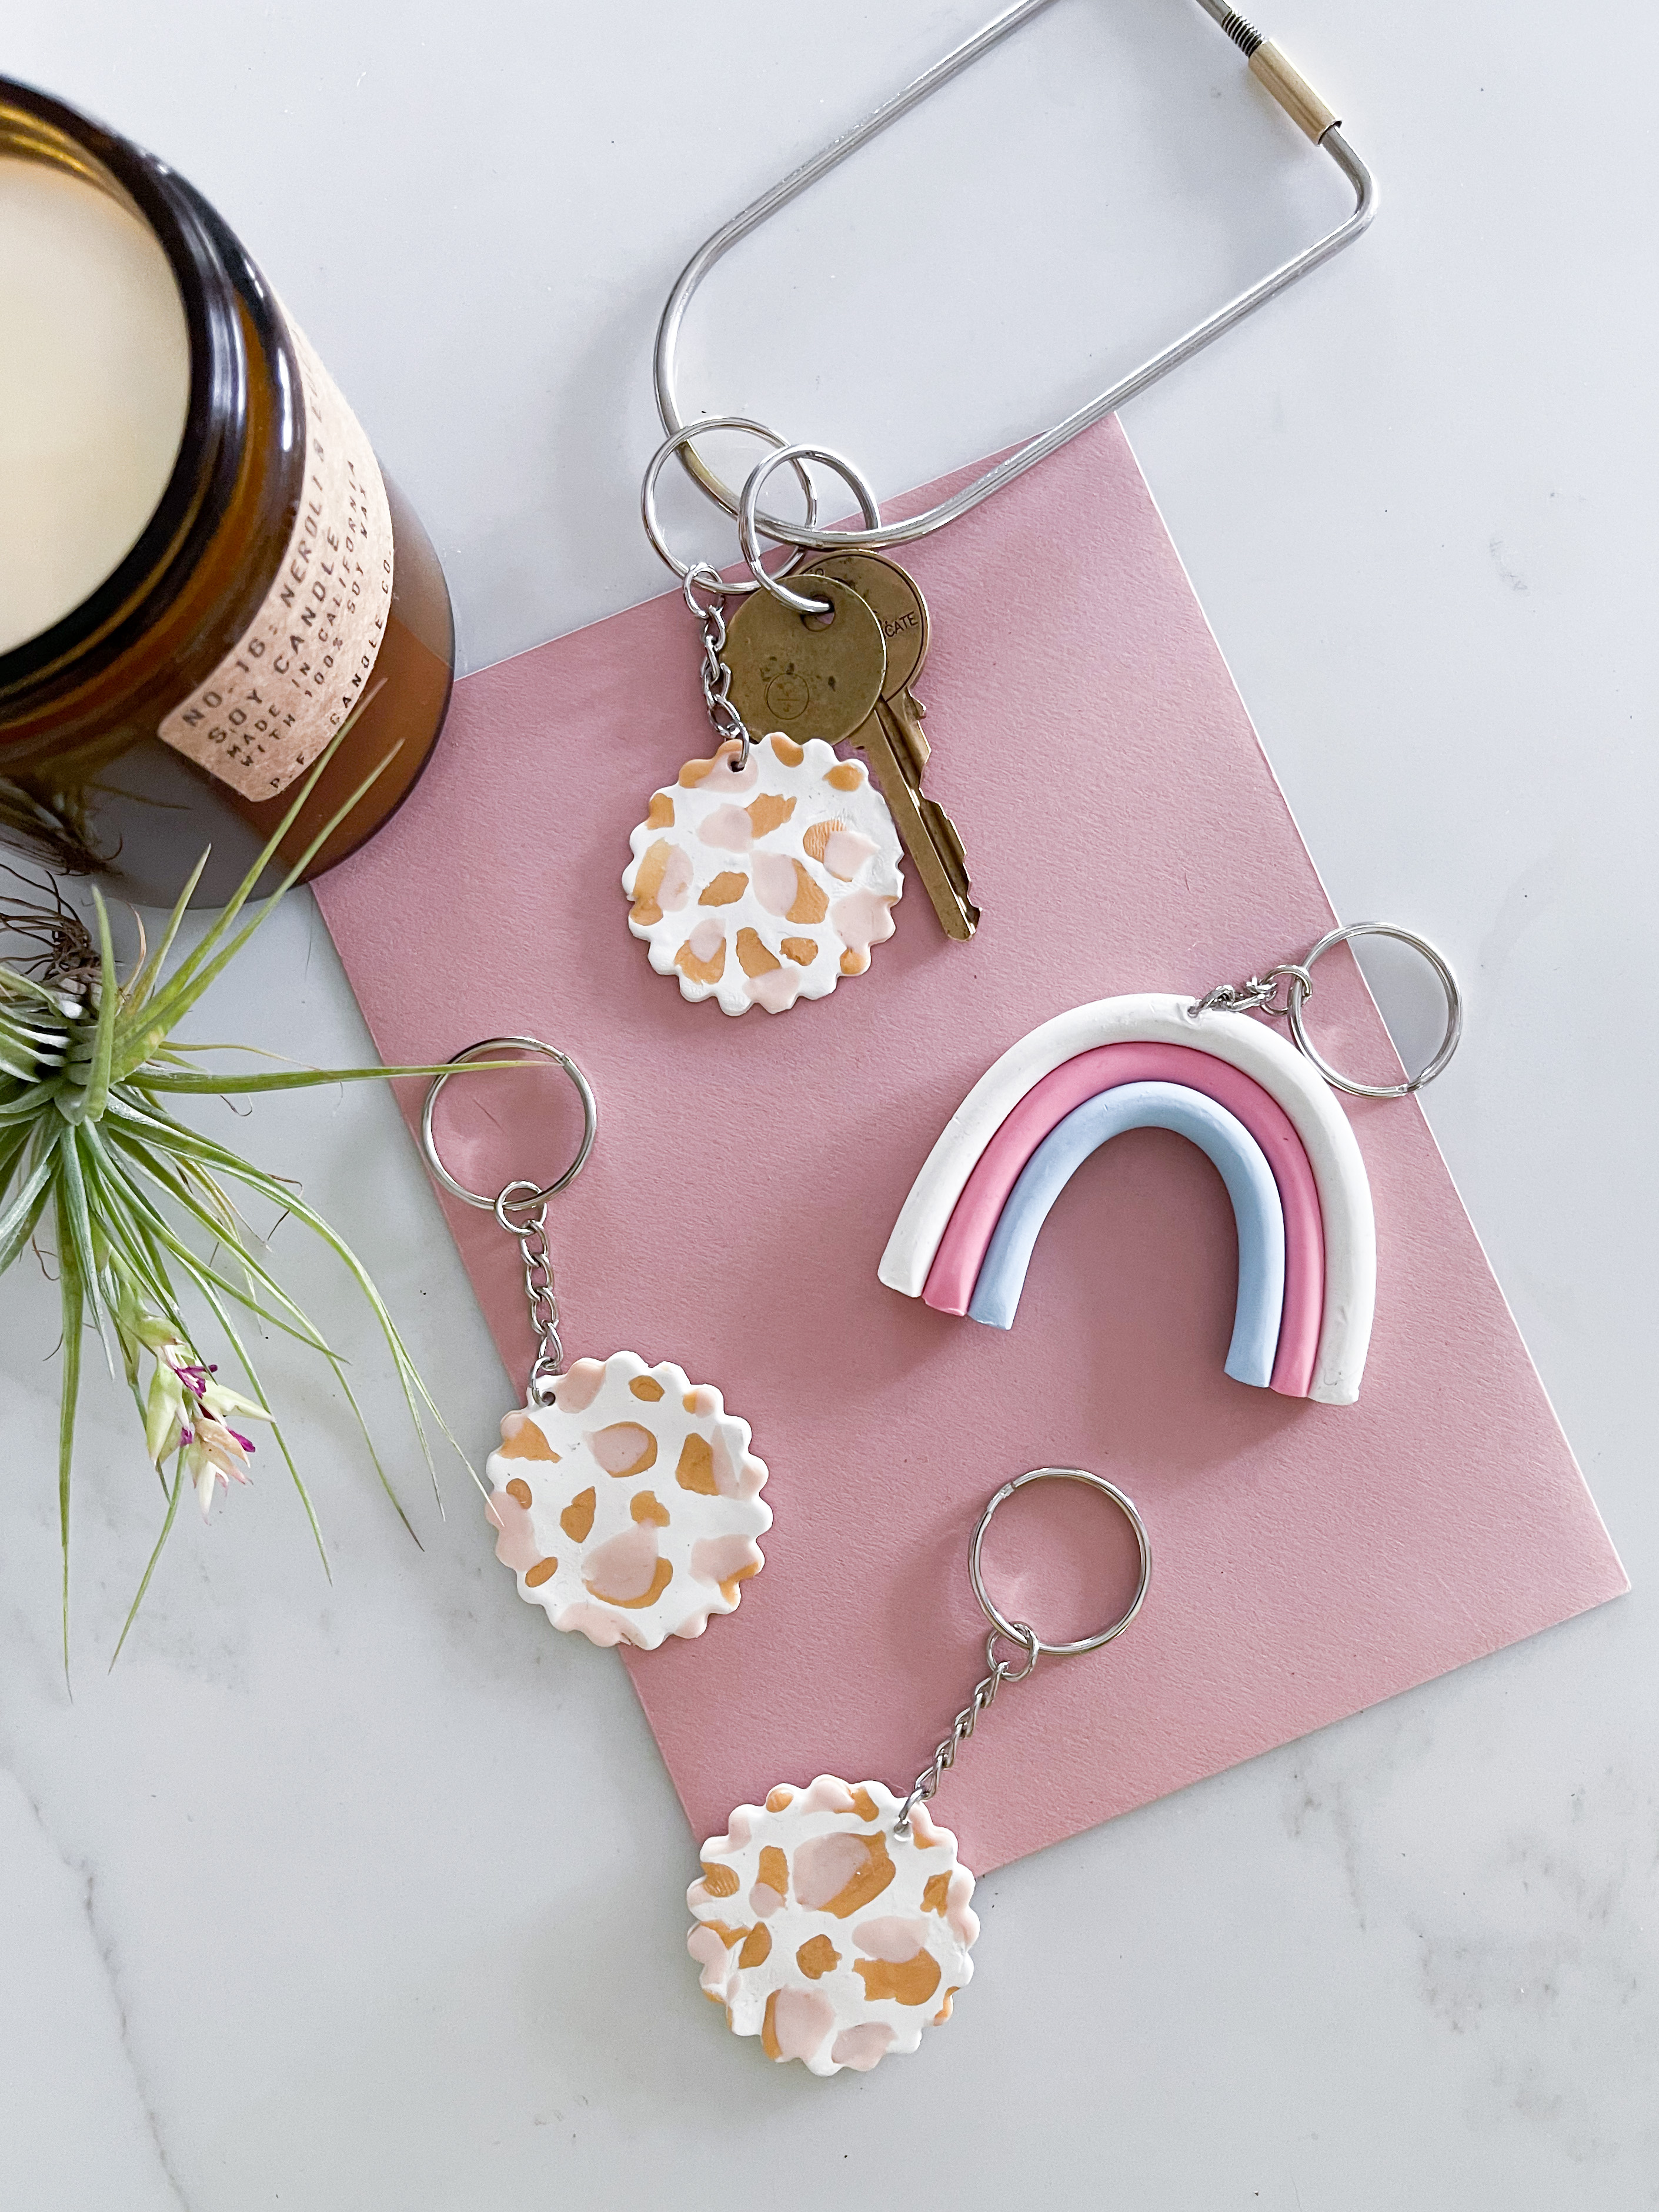
December weekends are for breaking out our craft supplies and getting creative with DIY gifts! ⁠Clay crafts have been trending for a minute and we’re here for it, which is why we whipped up these highly giftable polymer clay keychains. They’re easy, fun and odds are your friends won’t believe you made them 😉⁠ Keep reading for the full tutorial and links to supplies!

What You Need:

​Before you get started, lay down parchment paper to protect your surface​ and then tape it down. This also makes it easy to transfer your clay designs directly to a pan and pop it in the oven.

For the Rainbow Keychain:

Choose three colors you’d like for your rainbow​ and use your hand to roll the clay between your palms to start creating long rolls of clay. Use one hand and continue to roll on your parchment paper to help create an even diameter until you achieve a long roll that’s about 1/4″ thick.

Start by creating an upside-down U-shape with one of your colors, then add the second and third color on top of that. It should look like a mini rainbow! Gently press the rolls together to secure the three colors together, then use a knife to cut off the excess clay to even out your sides.
Use your toothpick to create a hole on top of the rainbow for your jump ring.

​For the Cheetah Print Keychain​

​Start by choosing a foundation color – we chose white – and roll out until it’s your desired thickness, then pick two colors to ​serve as your print! The darker of the two colors will go down first – we used gold. Pinch off small bits of the clay in organic shapes and place them on the white clay. Do the same for the lighter color – we used pink — on top of your darker color.

Once all of your bits are on your base color, take your roller and roll over the entire piece of clay until smooth. Now you have a super fun cheetah print!

Next, take a clay or cookie cutter of your choice and stamp as many shapes as you can into your piece of clay. Separate your new shapes and discard the extra clay, then use your trusty toothpick to poke a hole for your jump ring. 

Next, preheat your oven to 275 degrees. Pop your clay shapes in the oven for about 15 minutes and then left them cool completely for about 20 minutes.

Using your needle nose pliers, push a jump ring through the hole you created with your toothpick and attach your keychain rings. Close the jump ring and that’s it!

DIY Macramé Coaster Tutorial

Capture

Once an iconic 70’s trend, modern macramé is making a comeback and taking over your Instagram feeds in the form of hippie chic plant hangars, wall hangings, chairs, lampshades, and more. Today, we’re going to teach you how to make a simple coaster with two easy knots: the larks head and the square knot. Once you master these two moves, you’ll be on your way to being a macramé master.

Capture2

For this little DIY you’ll just need 8 4mm cords cut to 4 feet each, a pair of scissors and a hanger. Let’s get started!

3

STEP 1: Attach Cord to Hanger using a Larks Head Knot

The larks head knot is essential for starting off most macramé projects. You’ve probably used this knot many times in your life and just never knew it had a name! To start off, take one of your pre-cut cords and fold it in half. Place the center-folded section over and under the hangar, as shown above. Place your two “tails” through the center-folded section. Pull tight, congratulations you’ve completed your first larks head knot! Repeat this step with your remaining 7 cords until all 8 cords are attached to your hangar.

4.PNG

STEP 2: Create a Square Knot

You’ll notice you have 16 “tails” to work with after attaching your 8 cords using a larks head. Separate these 16 tails into 4 groups of 4. With your first 4 strands, cross the left tail over the middle two tails, to make the figure “4.” Place your right tail over this figure 4, as shown above. Cross your right tail under the two middle tails and up through the left loop. Pull all four tails tight! Repeat these steps, switching the right and left tails to reverse the knot. Tada, you’ve just completed a square knot!

5

STEP 3: Complete your first row of Square Knots

Repeat Step 2 with the remaining 12 tails to complete your first row of 4 square knots, as shown below.

6.PNG

STEP 4: Create Alternating Square Knots

The good news is, you already know how to do this! When starting your second row of square knots, leave your 2 outmost left and right tails to the side, and only use your inner 12 tails to create 3 square knots. Below shows a completed second row of alternating square knots, creating a lace effect. When you create the following third row, you’ll use all 16 tails again to create 4 square knots, similar to your first row.

7

STEP 5: Finish it off

Cut Excess cord on the side you have just finished, leaving about an inch. Next, cut the cord that’s looped around the hanger, leaving an inch on that side as well. Take a comb to the excess cord to unravel it a bit and turn it into fringe. You just made a coaster! Way to go. Get yourself a cold beverage and break that baby in.

8


10 Tips to DIY Your Own Floral Arrangement

Nothing brightens up a space like flowers and a trip to the Los Angeles Flower Markets is one of our favorite ways to spend a morning. To celebrate the arrival of spring, we rolled up our sleeves for a team DIY designing our own arrangements. We’re excited to share our 10 favorite tips to help you design your own!

Image 1

1. Buying the Blooms – It can be overwhelming when you begin planning an arrangement. Choosing one or two colors to focus on is a great way to narrow down the options. Try selecting either a “warm” (reds/orange/yellow) palette or a “cool” (blue/green/purple) palette and anchor your design with 2-3 prominent blooms such as dahlias, peonies or protea.

2. Don’t Forget the Foliage- You may not have noticed but most arrangements are not just flowers, but also foliage. Add vines, leafy greens, berries, vines, and even fern cuttings to design around your focal florals. Foliage adds character, texture, and shape without distracting from your floral focal points.

Image 2

3. Stripping- Many people make the mistakes of putting flowers right in the vase without any maintenance. You need to strip your flowers or they will not last as long! Stripping is the process of removing any leaves on the stems of your florals that will be submerged in your water to prevent mold. You can leave some leaves at the base of your floral to add volume, or you can remove all.

4. Add Intrigue- Contrast is essential to creating an interesting arrangement. Make sure to cut your flowers and foliage at different heights to add dimension to the arrangement and think about playing with different shapes, such as the spiky look of a dahlia with a soft anemone. Seek beauty in the juxtaposition.

Image 3

5. Don’t Rush It- Take your time while putting your arrangement together, this is the fun part! If you’re not achieving the look you want, just start again. Put on some music and let nature’s blooms guide you.

6. Think Outside the Vase- You can use just about any container for florals so feel free to design your arrangement for a favorite mug, old pasta sauce jar or the pretty container of a used up candle. Just make sure the container is waterproof and thoroughly cleaned.

7. Water- The key ingredient for good floral maintenance is water. Make sure your florals are supplied with plenty of water, and that starts right when you get home. Cut the stems immediately and put them in water until you’re ready to arrange. Then trim again before adding to your vessel. It’s best to cut on a diagonal, which exposes more of the stem to water. After you arrange your blooms, make sure to give them as much water as the container will allow so they can drink up after being transferred numerous times.

Image 4

8. Fine-Tune Blossoms- While natural beauty is more appealing than anything, not every bloom is perfect. This is where pruning comes in. If there are any buds that distract from the overall arrangement, don’t be afraid to remove them. Eliminate petals that are broken or browning and trim any leaves competing for water.

9. Keep ‘Em Cool-| Always place finished arrangements in a cool space. Check the water frequently– you would be surprised how much flowers can drink!

Image 5

10. Upgrade your Tools- You can absolutely make a beautiful arrangement with just a vase and a pair of scissors but if you’re going to be working with florals regularly we recommend a few purchases to make the process easier:

  • Pruning Shears- to strip florals with thorns and cut thicker stems
  • Floral Wire & Floral Tape- to help secure any florals. You can use wire to help wrap and arrange smaller stems as well as create structured pieces, like boutonnieres. Floral tape is self-sealing tape and can be used to wrap stems or create bouquets.
  • Clear Floral Tape– to make a grid for spaced out arrangements
  • Oasis Floral Foam– if you’re creating arrangements for an event, this floral foam is your friend! Just dunk in water and it will absorb. Stick fresh florals in and the foam will keep them hydrated and in place throughout any event. It also comes in a variety of sizes allowing you to create floral wreaths, hearts, and 3D shapes.

Image 6

10 Food Inspired DIY Halloween Costumes

Here at Soda Pop PR we take food seriously. (Trick or treat? Don’t mess around; we will always take the treat.) So it should come as no surprise that we’re drawn to costumes that express our culinary love. We’ve scoured the internet to find the best DIY Halloween costumes for food lovers. Hope some of these ideas will inspire all you last minute costume planners!

DIY-Pineapple-Costume1-600x900

(Studio DIY)

diy-halloween-costume-morton-salt-girl

(Ecouterre)

CaptainKale02

(The Kitchn)

sriracha-costume-1

(Sarah Hearts)

DIY Pizza Halloween Costume_thumb[2]

(U Create Crafts)

Donut-Costume-DIY2-600x900

(Studio DIY)

2e5442caedb427832487980ebc49f6ef

(Mayuk Radzis)

02-5-300x266

(Baby Gizmo)

deviled-egg_612

(Epicurious)

dog

(Top Ten DIY)